Node Tutorial - Part 4: Workspace Optimization
Testing Affected Projects
affected is a mechanism that relies on your git metadata to determine the projects in your workspace that were affected by a given commit.
Run the command:
git add . && git commit -m "commiting to test affected"
Then make a change to your example products in your products-data-client project:
export const exampleProducts: Record<string, Product> = {
  '1': { id: '1', name: 'Product 1', price: 100 },
  '2': { id: '2', name: 'Product 2', price: 400 }, // changed here
};
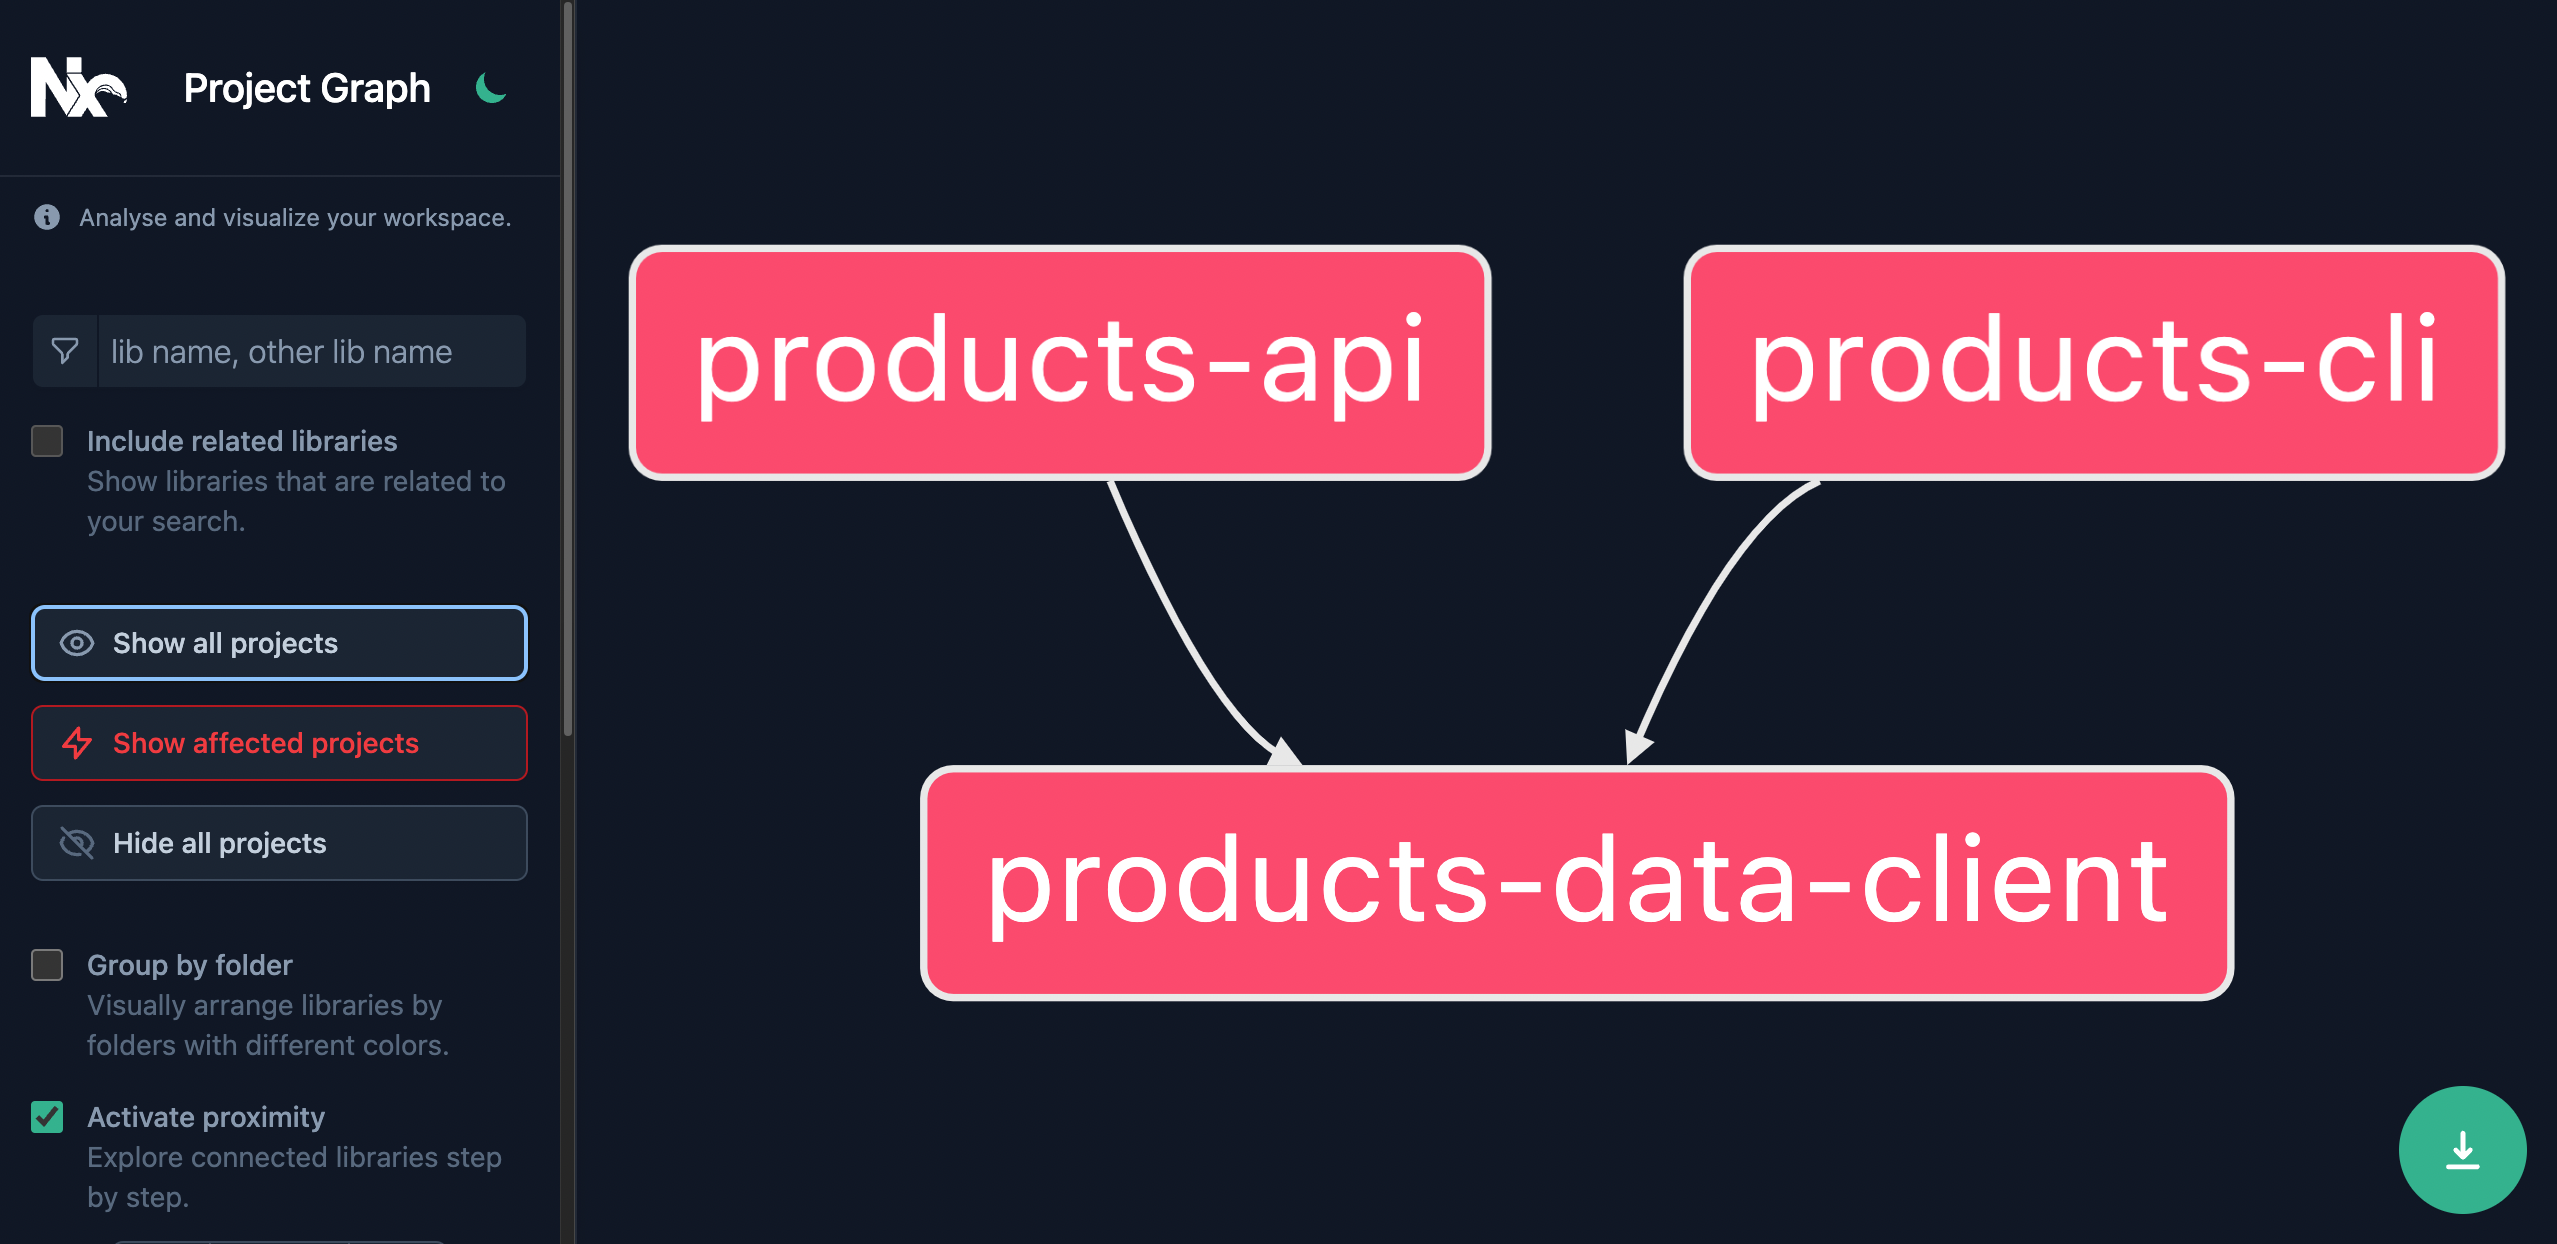
Run the following command to visualize how our workspace is affected by this change:
npx nx affected:graph

The change made to the products-data-client project is also affecting the products-api and products-cli projects, since both of those projects import from the products-data-client project.
Next, stash your changes since the commit:
git stash
And then make a minor adjustment to the products-cli project:
import { createProductsDataClient } from '@my-products/products-data-client';

main();

async function main() {
  const productsDataClient = createProductsDataClient();
  const id = getProvidedId();
  if (id != null) {
    const product = await productsDataClient.getProductById(id);
    if (!product) {
      throw new Error(`Product with id ${id} not found`);
    }
    console.log(JSON.stringify(product, null, 2));
  } else {
    const products = await productsDataClient.getProducts();
    console.log(JSON.stringify(products, null, 2));
  }
}

function getProvidedId() {
  return process.argv[2];
}
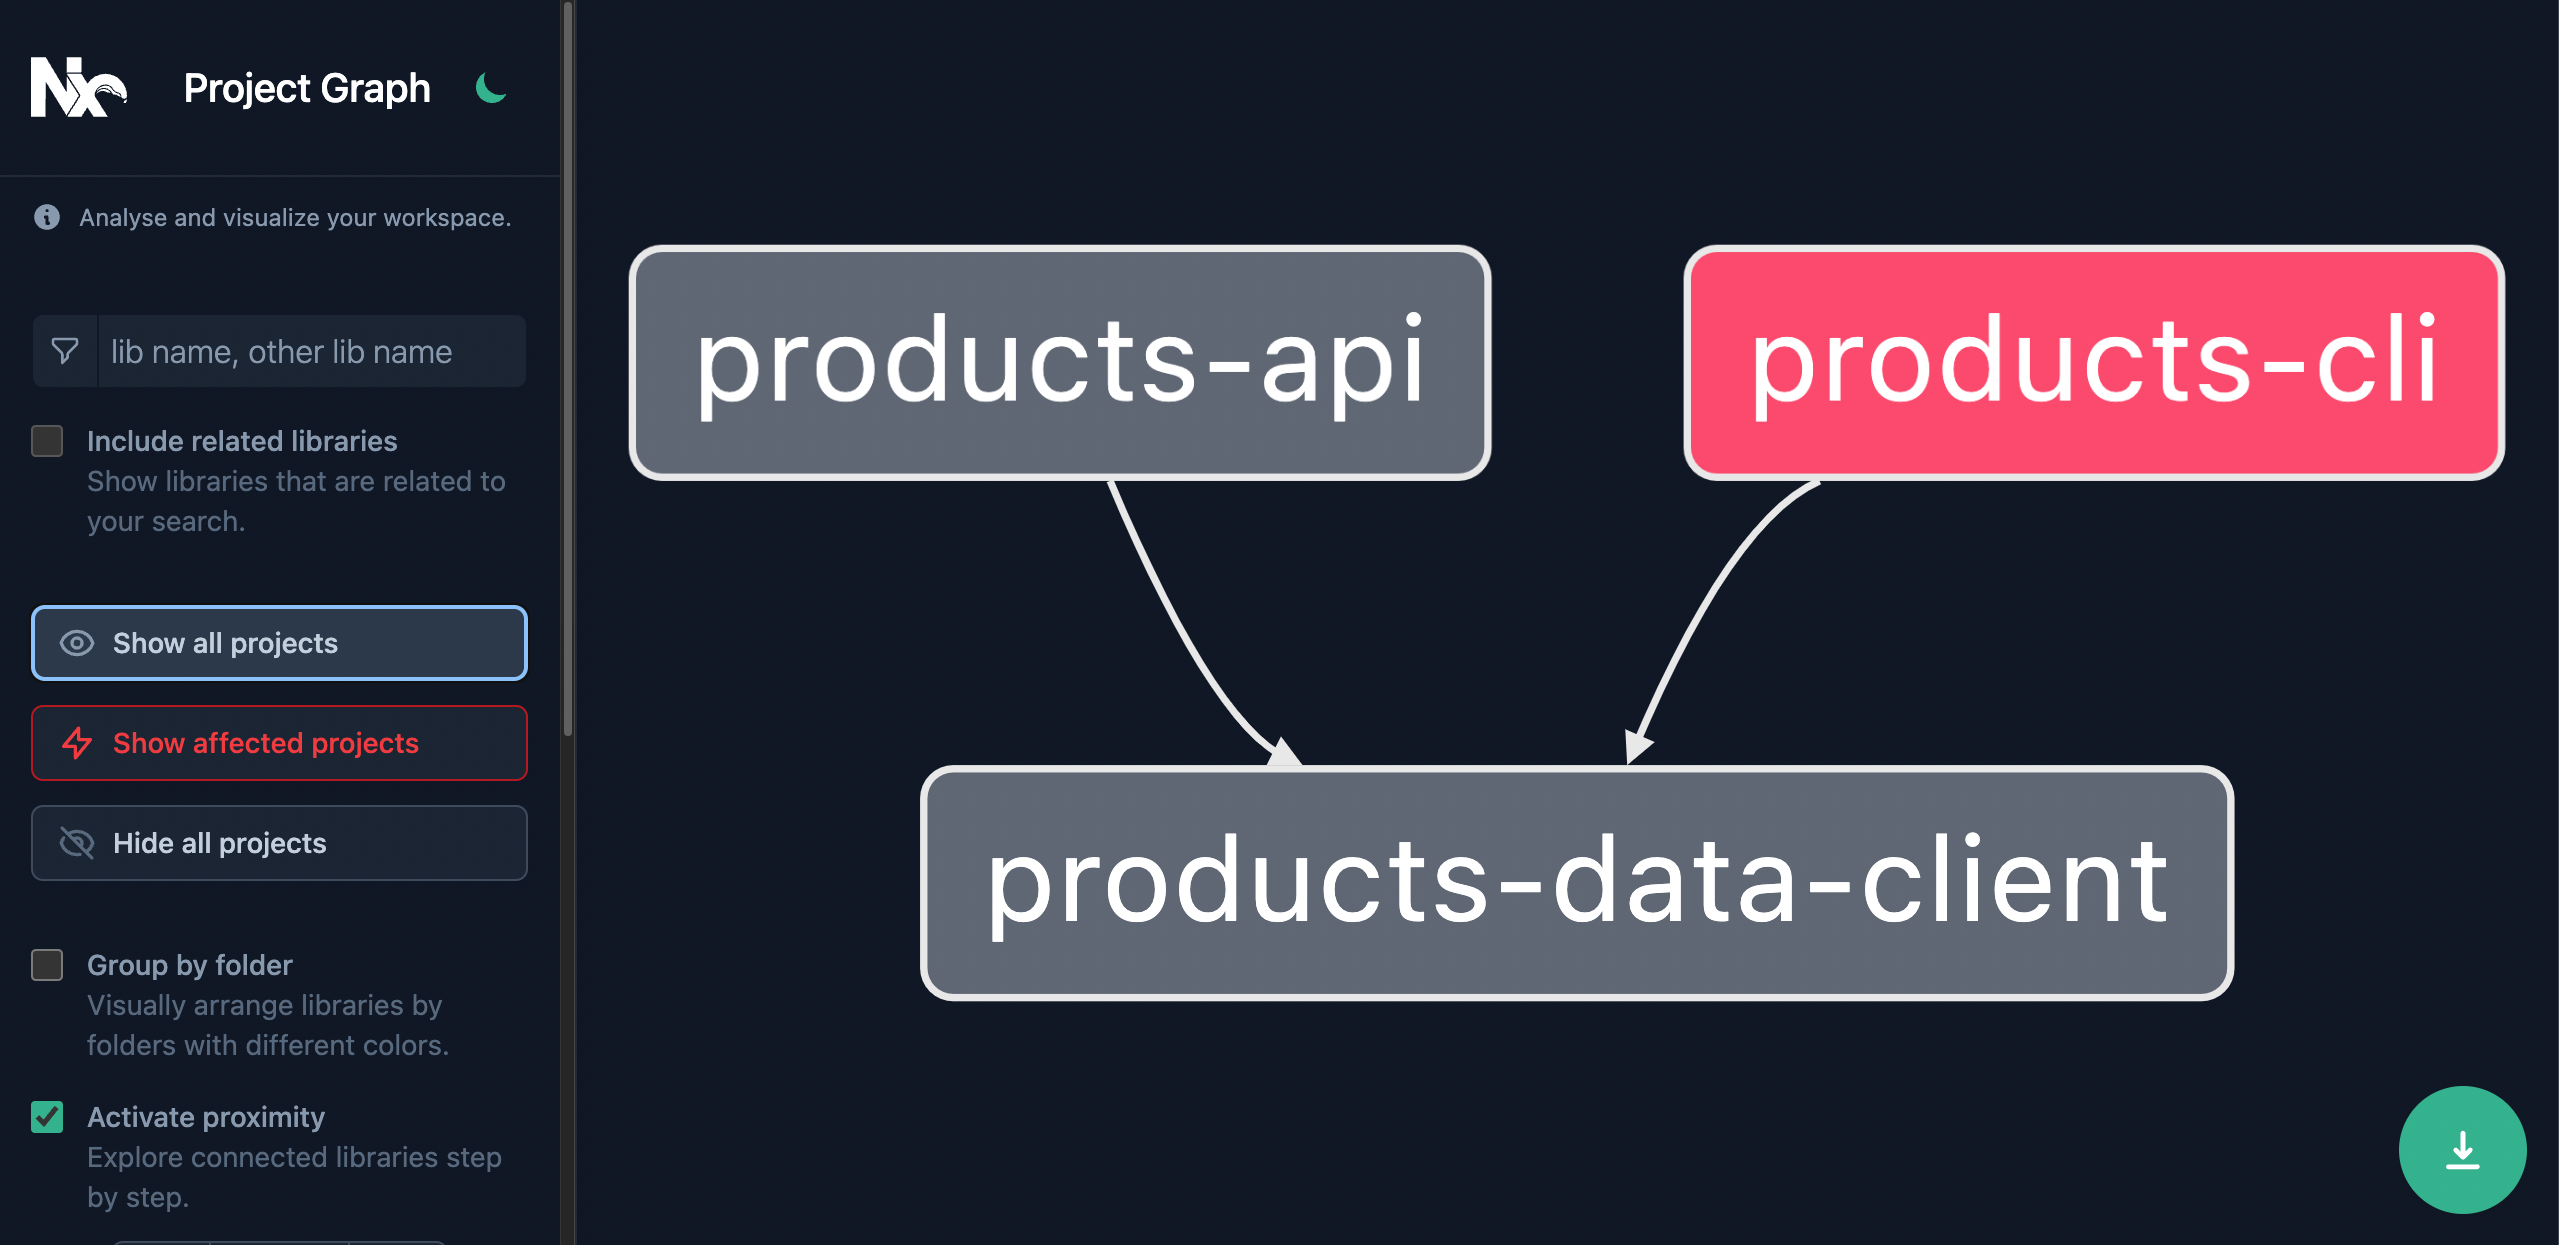
Now run the command to visualize the affected graph again:
npx nx affected:graph

This can be leveraged to run tasks only on the projects that were affected by this commit.
To run the test targets only for affected projects, run the command:
npx nx affected --target=test
This can be particularly helpful in CI pipelines for larger repos, where most commits only affect a small subset of the entire workspace.
Checkout Affected documentation for more details
Task Caching
affected allows you to "skip" tasks that couldn't possibly be affected by your changes. Task Caching allows you to "replay" tasks that have already been run.
Task Caching is informed by "inputs" and "outputs":
Inputs
Inputs for your task caching includes by default any environment details and all the source code of the projects and dependencies affecting your project.
When running a task, Nx will determine all the inputs for your task and create a hash that will be used to index your cache. If you've already run this task with the same inputs, your cache will already be populated at this index, and Nx will replay the results stored in the cache.
If this index does not exist, Nx will run the command and if the command succeeds, it will store the result in the cache.
Outputs
Outputs of the cache include the terminal output created by the task, as well as any files created by the task - for example: the artifact created by running a build task.
Outputs are defined for every target in your workspace:
{
  "name": "products-data-client",
  "$schema": "../../node_modules/nx/schemas/project-schema.json",
  "sourceRoot": "libs/products-data-client/src",
  "projectType": "library",
  "targets": {
    "build": {
      "executor": "@nrwl/js:tsc",
      "outputs": ["{options.outputPath}"],
      "options": {
        "outputPath": "dist/libs/products-data-client",
        "main": "libs/products-data-client/src/index.ts",
        "tsConfig": "libs/products-data-client/tsconfig.lib.json",
        "assets": ["libs/products-data-client/*.md"]
      }
    },
    "lint": {
      "executor": "@nrwl/linter:eslint",
      "outputs": ["{options.outputFile}"],
      "options": {
        "lintFilePatterns": ["libs/products-data-client/**/*.ts"]
      }
    },
    "test": {
      "executor": "@nrwl/jest:jest",
      "outputs": ["coverage/libs/products-data-client"],
      "options": {
        "jestConfig": "libs/products-data-client/jest.config.ts",
        "passWithNoTests": true
      }
    }
  },
  "tags": []
}
Outputs are stored in the cache so that terminal output can be replayed, and any created files can be pulled from your cache and placed where they were created the original time the task was run.
Example
To see caching in action, first clear your dist directory:
rm -rf dist/"
And run the command npx nx build products-data-client. (Recall that you had already run this target in 3- Task Running)
~/my-products❯
npx nx build products-data-client
> nx run products-data-client:build  [local cache]

Compiling TypeScript files for project "products-data-client"...
Done compiling TypeScript files for project "products-data-client".

 ———————————————————————————————————————————————————————————————————————————————————————————————

 >  NX   Successfully ran target build for project products-data-client (32ms)

   Nx read the output from the cache instead of running the command for 1 out of 1 tasks.
Notice that [local cache] is mentioned in the terminal output, and that this time the command only took 32ms to run.
Also notice that the result of your build has been added back to the dist/libs/products-data-client directory.
See the documentation for more information on caching.
Configuring Task Pipelines
Next, run the command npx nx build products-cli:
~/my-products❯
npx nx build products-cli
   ✔    1/1 dependent project tasks succeeded [1 read from cache]

   Hint: you can run the command with --verbose to see the full dependent project outputs

 ———————————————————————————————————————————————————————————————————————————————————————————————


> nx run products-cli:build

chunk (runtime: main) main.js (main) 1.71 KiB [entry] [rendered]
webpack compiled successfully (bafa37be9890ecb2)

 ———————————————————————————————————————————————————————————————————————————————————————————————

 >  NX   Successfully ran target build for project products-cli and 1 task(s) it depends on (2s)

   Nx read the output from the cache instead of running the command for 1 out of 2 tasks.
Notice the line here:
✔ 1/1 dependent project tasks succeeded [1 read from cache]
This is because your products-cli project depends on your products-data-client project, which also has a build target. By default Nx is configured to run (or read from cache) the build target for any dependencies that have a build target, before running the build on the original project.
This feature allows the Nx graph to dynamically maintain task dependencies, rather than having to manually maintain those task dependencies as your workspace continues to grow.
See the Task Pipeline Configuration Guide for more details on how to configure your Task Graph.
What's Next
- Continue to 5: Summary